WordPress is one of the most popular content management systems (CMS) in the world, powering over 40% of websites globally. While many people use WordPress without touching a line of code, serious customizations and advanced functionality often require the help of developers. But not all developers are the same. You’ll often hear terms like front-end, back-end, and full-stack development. So, what do they mean—especially in the context of WordPress?
In this blog, we’ll break down the key differences between front-end, back-end, and full-stack WordPress development, what skills are needed for each, and how to choose the right type of developer for your project.
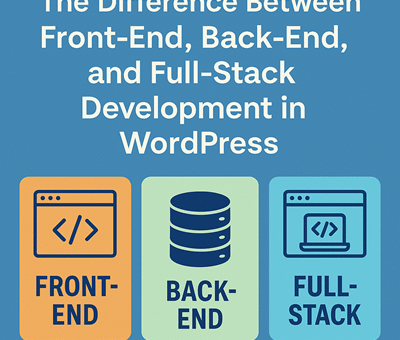
What is Front-End Development in WordPress?
Front-end development refers to the part of a website that users see and interact with. In WordPress, this usually involves themes, user interfaces, and ensuring responsive, visually appealing layouts.
Key Responsibilities:
-
Customizing or creating WordPress themes
-
Styling pages with HTML, CSS, and JavaScript
-
Working with page builders like Elementor, Gutenberg, or WPBakery
-
Ensuring mobile responsiveness and cross-browser compatibility
-
Optimizing performance and user experience (UX/UI)
Common Tools and Languages:
-
HTML, CSS, JavaScript
-
jQuery, React (especially for Gutenberg blocks)
-
Theme development tools
-
Figma or Adobe XD for design implementation
Ideal for: Someone who wants to create a visually stunning and user-friendly website.
What is Back-End Development in WordPress?
Back-end development is all about the server side of a WordPress website. It involves working with the WordPress core, databases, and anything that happens behind the scenes.
Key Responsibilities:
-
Building and customizing plugins
-
Working with WordPress hooks, filters, and APIs
-
Creating custom post types and taxonomies
-
Integrating third-party APIs (like payment gateways or CRMs)
-
Ensuring site security, speed, and database optimization
Common Tools and Languages:
-
PHP (the core language of WordPress)
-
MySQL (for database management)
-
REST API
-
Server management tools (e.g., cPanel, WP-CLI)
Ideal for: Someone who needs custom functionality, automation, or third-party integrations.
What is Full-Stack Development in WordPress?
Full-stack development combines both front-end and back-end skills. A full-stack WordPress developer can handle everything from designing the user interface to building complex plugins and server configurations.
Key Responsibilities:
-
Handling entire site development from start to finish
-
Bridging the gap between design and functionality
-
Managing both theme and plugin development
-
Setting up hosting, deployment, and security protocols
Common Tools and Languages:
-
All front-end and back-end tools mentioned above
-
Git for version control
-
Deployment tools like Docker or GitHub Actions
-
WordPress CLI, Composer, and build tools like Webpack
Ideal for: Clients or agencies looking for an all-in-one solution with a single developer or team that understands every part of the project.
Which One Do You Need?
Choosing the right type of developer depends on your project goals:
-
Design-focused site? Go with a front-end developer.
-
Custom functionality or plugin integration? Choose a back-end developer.
-
Starting a site from scratch or need an all-in-one expert? Hire a full-stack developer.
Final Thoughts
Understanding the difference between front-end, back-end, and full-stack development in WordPress can help you make better hiring decisions, communicate more effectively with developers, and build a more successful website. Whether you need a sleek design, powerful features, or both, there’s a specialist for the job—or a full-stack pro who can do it all.